
These guidelines apply to every task in the app. For task-specific options, see each task's page.
Task selection
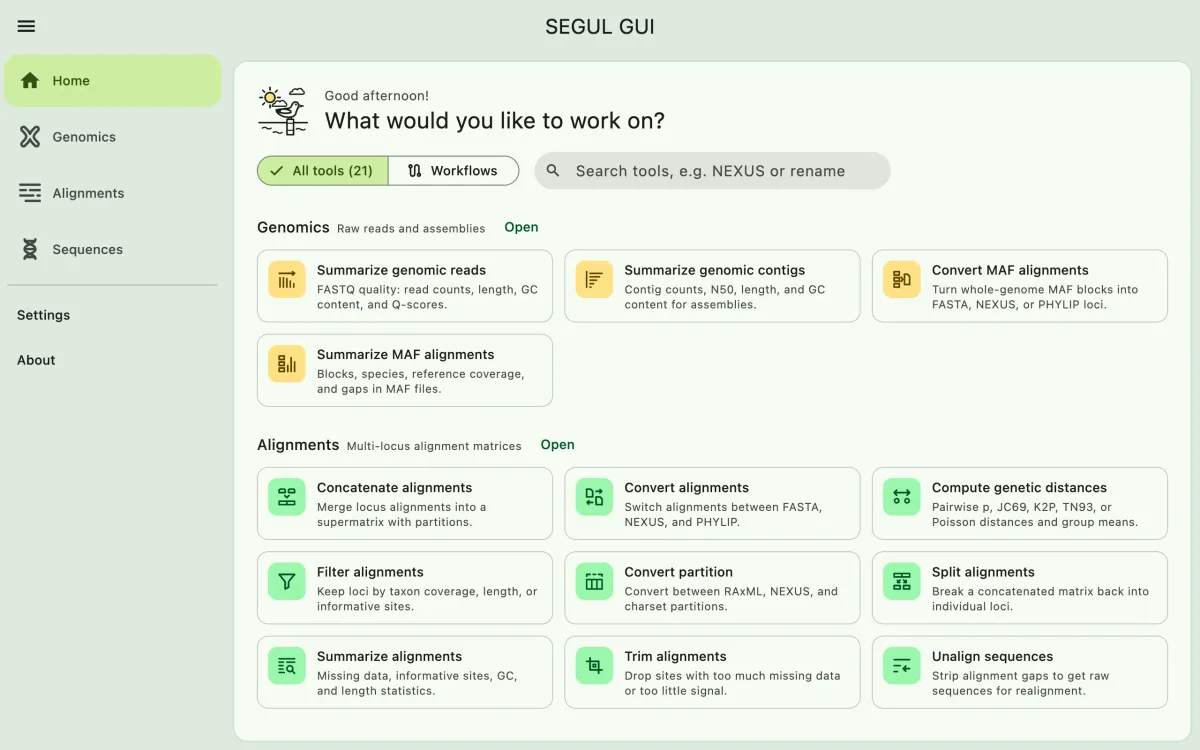
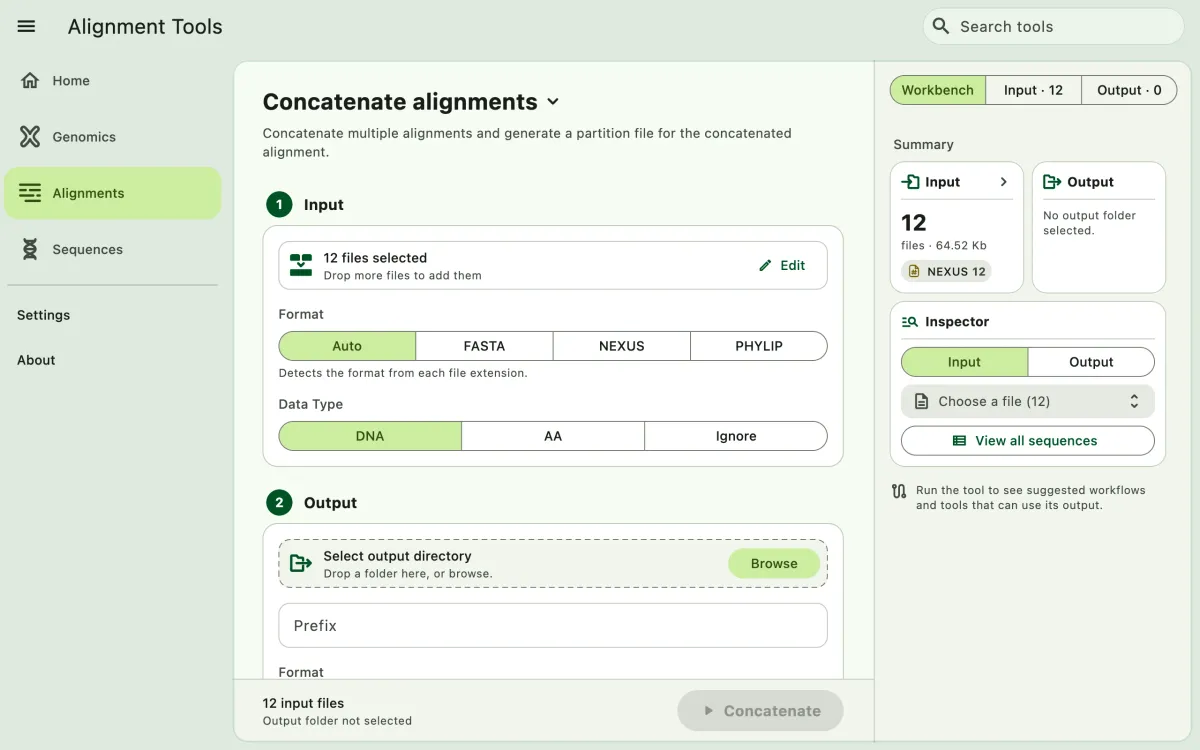
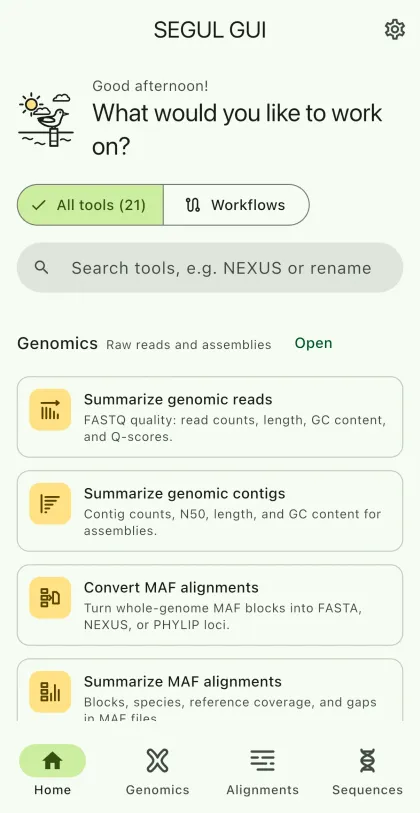
Section titled “Task selection”Pick a task group from the navigation bar A. Tasks are grouped into Genomics, Alignments, and Sequences, following the task groups. You can also open a tool from the catalog on the home screen B, or find it by name or file format with the tool search C.
File input
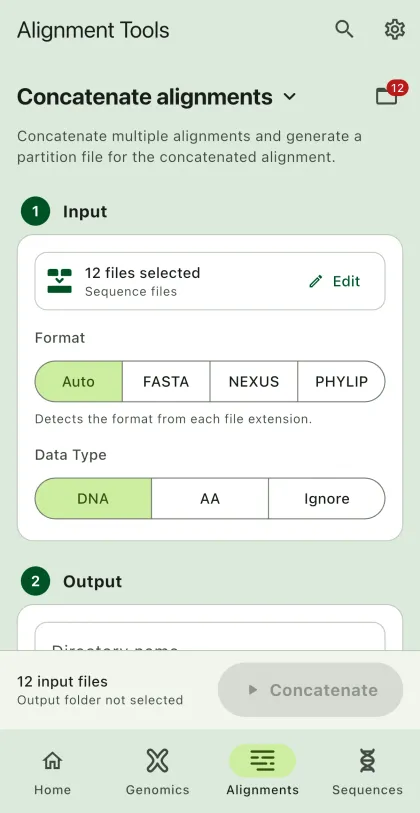
Section titled “File input”Each tool starts with an input card D. It offers these routes:
Files
Browse filesPick files one by one. Best for a few hundred files.
- Available on Desktop
- Available on Android
- Available on iOS
Folder
Browse folderAdd every matching file in a folder and its subfolders.
- Available on Desktop
- Available on Android
- Available on iOS
Archive
Open archivePick one .zip or .tar.gz file. Fastest on phones. Not for raw reads.
- Available on Desktop
- Available on Android
- Available on iOS
SEGUI folder
SEGUI folderCopy data into SEGUI › inputs in the Files app or Finder.
- Not on Desktop
- Not on Android
- Available on iOS
Share
Use shared filesSend files or an archive to SEGUI from another app.
- Not on Desktop
- Available on Android
- Available on iOS
Drag and drop
Drop on the inputDrop files or folders from your file manager.
- Available on Desktop
- Not on Android
- Not on iOS
On phones and tablets, the operating system does not let apps read your files directly, so most routes copy or extract the input into SEGUI's private cache first:
- PickFiles, folder, archive, or share
- Copy or extractInto SEGUI's private cache
- Find matchesOnly the tool's input format
- Run taskOutput goes to the app folder
- Clear inputsFrees the cached copies
- Select Browse files and pick the files. Hold
Ctrl/CmdorShiftto pick several, or pressCtrl/Cmd+Ato pick all. - Or select Browse folder. SEGUI searches the folder and its subfolders and adds only files that match the tool's input format.
- Or select Open archive and pick one
.zip,.tar.gz, or.tgzfile. You can also drag files or folders onto the input area. - Use Add files, Add folder, or Add archive to add more input to the list.
- For a few files, select Browse files. Android copies each file into SEGUI, which shows Copying files… while it works.
- For many files, select Browse folder. SEGUI copies matching files from the folder and its subfolders and shows a counter, such as Copying 120 / 1,500. Select ✕ to stop copying; files copied so far are kept.
- For the largest datasets, compress them into one
.zipor.tar.gzfile and select Open archive. Only one file is copied, then SEGUI extracts it. - You can also share files or an archive to SEGUI from Files, email, or a cloud drive. A shared files ready banner appears; select Use shared files in the tool's picker.
- For a few files, select Browse files. iOS copies each file into SEGUI first.
- For many files, select Browse folder. SEGUI opens the folder in place, without copying, and adds matching files from its subfolders.
- Or select Open archive and pick one
.zipor.tar.gzfile for SEGUI to extract. - Or copy your data into the SEGUI folder: in the Files app, go to On My iPhone › SEGUI › inputs (or use Finder on a Mac). Then select SEGUI folder in the picker.
- You can also use Open in SEGUI or Share from another app. Select Use shared files in the tool's picker.
Large datasets on mobile
Section titled “Large datasets on mobile”Removing files
Section titled “Removing files”Open the input files panel E (on phones and narrow windows, tap the files button next to the tool name) and select remove next to a file. This only removes it from the list, not from your storage. Clearing the inputs also deletes SEGUI's cached copies, which are cleaned again at app start.
macOS file access
Section titled “macOS file access”SEGUI runs in the App Sandbox, so it can open only the files and folders you pick or drop onto it. SEGUI remembers each folder you pick or drop, so it opens again after a restart without asking. Access to a folder covers everything inside it.
To allow a folder ahead of time, such as your home folder, open Settings › Folder access, select Add folder, and choose the folder. Remove a folder there to take its access back.
Input format
Section titled “Input format”SEGUI reads NEXUS, FASTA, and PHYLIP. Auto (the default) detects the format from the file extension; set it with the Format button otherwise. Unlike the CLI, the GUI only accepts standard extensions, so rename other files or use the CLI.
Data Type (alignment and standard sequence only)
Section titled “Data Type (alignment and standard sequence only)”The app supports both nucleotide and amino acid sequences. By default, it sets to DNA. You can also use Ignore to ignore the data type.
Optional Parameters
Section titled “Optional Parameters”Some tasks have optional parameters. Follow the task's documentation to learn more about the parameters and their usage.
Output
Section titled “Output”On desktop platforms, the application saves the output in the user's chosen directory. However, due to the restrictive nature of mobile platforms, the application defaults to saving the output in its designated directory. To keep a copy elsewhere, export the output files as an archive or share them with other apps.
Workbench and Next Steps
Section titled “Workbench and Next Steps”The Workbench tab in the file panel summarizes the input and output files.
Use the Inspector card to check a single file without leaving the tool. Choose Input or Output, then pick a file from the searchable list. The inspector shows the file's format, content, and size, plus counts that match its content: sequences, sites, and data type for alignments; the number of partitions for partition files; rows and columns for tables; loci and taxa for alignment reports; loci and samples for distance reports; samples for read reports; and lines for text files. Select Open to view the file, or View all sequences to open the alignment viewer on every FASTA, NEXUS, and PHYLIP file in the list, so you can step through them without picking each one. Before a run, the inspector lists the input files; after a run, it lists the new output files.
After a run finishes, the workbench also lists:
- Report: tools that write an interactive report show this card first:
Summarize alignments,Compute genetic distances, and the Complete mode ofSummarize genomic reads. SelectView reportto open it. See summary reports. - Parameters: the settings used by the run.
- Suggested workflows: each common workflow from the home screen that includes the tool, with its progress. Select
Continueto open the next step. - Other compatible tools: tools that can take the run's data.
Opening a next step or compatible tool passes the run's output files to it as input, so you can chain analyses without returning to the home screen. Tools that write only summaries, such as Summarize alignments, pass on their input files instead. Choose an output folder for each new step.
Exporting Output
Section titled “Exporting Output”In the Output panel, choose Select, then pick the files or folders you want. Select Export in the toolbar under the file list and choose a format:
- ZIP: a
.ziparchive that opens on any computer. - Gzip: a
.tar.gzarchive, common on Linux and computing clusters.
Select Export to save the archive where you choose. Files keep their folders inside the archive. On macOS, Windows, Android, and iOS, you can select Share instead to send the archive to another app.
Sharing Output
Section titled “Sharing Output”On macOS, Windows, Android, and iOS, the app can share output files with other devices or apps, such as OneDrive, DropBox, and other installed cloud provider apps. For instance, using AirDrop for macOS. After a task finishes, the run button F becomes Quick Share. Select it to compress the output files and share them as a single file. To share one file, open the menu (⋮) next to it in the Output tab and select Share. Linux has no system share sheet, so use Export there instead.
In-App built-in file viewer
Section titled “In-App built-in file viewer”Supported file types:
- Plain-text files (
.txt) - Comma separated values (
.csv) - Sequence files in FASTA, NEXUS, or PHYLIP format
- Summary reports:
alignment-report.json,distance-report.json, andread-report.json
The app can directly view the supported file types. The content will be displayed in a new window. For the desktop version, you can also select open the file in other app. It will open default on default apps for the file type. This method also works for unsupported file types.
Table viewer
Section titled “Table viewer”CSV files, such as the locus, taxon, contig, and MAF summaries, open in a table. Numbers use a thousands separator and up to two decimals (for example, 1,000 and 0.65).
- Sort: select a column heading to sort by it. Select it again to reverse the order. The arrow next to the heading shows the direction. Names sort naturally, so
locus_2comes beforelocus_10. - Resize: drag the handle at the right edge of a text column heading, such as a sample or locus name, to make the column wider or narrower. Double-click the handle (double-tap on a touch screen) to reset the width.
- Pages: large tables show 50 rows at a time. Choose 50, 100, 250, or 500 under
Rows per page, and move between pages with the arrows below the table. Sorting starts again from the first page. - Bars in cells: in columns of numbers, a bar behind each value shows where it sits between the lowest and highest value of the column, so you can spot unusually short loci or gappy taxa while scrolling. Columns where every row has the same value show no bars.
- Scrolling: the column headings and the page controls stay in place while the rows scroll. Wide tables scroll sideways, and the row scrollbar stays at the right edge of the table.
Summary reports
Section titled “Summary reports”Summary tools write a report that SEGUI opens as interactive charts and tables:
- Alignment report from
Summarize alignments. - Read report from the Complete mode of
Summarize genomic reads. - Distance report from
Compute genetic distances.
Open a report from the Report card in the Workbench tab after a run, or open its JSON file from the Output tab or the inspector later. The other summary tools, such as contig and MAF summaries, write CSV files that open in the table viewer.
The reports work the same way:
- Tabs: each report is split into tabs, such as
Overview,Loci, andDistributions. Select a tab to switch. - Bars, Table, and Heatmap: tabs that list items, such as loci, taxa, or samples, show one statistic per item as
Bars, or every statistic as aTableor aHeatmap. Light lines separate the table columns, and the heatmap colors each number from the lowest to the highest value in its column. Choose the statistic with the chips above the bars. Select a bar or a row to open that item. - Fixed controls: the controls stay at the top and the open item's values stay at the bottom, while the bars or rows scroll between them. On phones and short windows, the whole tab scrolls instead.
- Tables: the same table as the table viewer, sortable by column, a page at a time, with a bar behind each number. The open item's row is highlighted, and the table turns to its page when you open another item.
- Charts: hover over or touch a chart to see its values. Zoom along the horizontal axis with the mouse wheel or a pinch, and drag or scroll with a trackpad to pan. A reset button appears at the top right of a zoomed chart; select it to show the whole chart again.
Alignment viewer
Section titled “Alignment viewer”FASTA, NEXUS, and PHYLIP files open in the alignment viewer. NEXUS partition files, which hold only a sets block of charsets, open as text instead, and the viewer leaves them out when it switches between files. It draws only the part of the alignment on screen, so alignments of 10,000 sites or more scroll smoothly. Taxon names stay pinned on the left and site numbers on the top.
Switch files: when you open a file from the input or output list, the viewer can move between the other alignment files in that list without going back. The file switcher sits above the toolbar, next to the gull. Use its arrows, press
Alt+↑or↓(Optionon macOS), or click the file name to search for a file. Files are listed in natural order, souce-2comes beforeuce-10. Select the list button at the end of the switcher to show every file beside the viewer. Filter it by name, and use the sort button in the filter box to sort by name or size, in either direction. On phones, the list opens as a sheet. Zoom, colors, chunk size, and the name panel width stay the same when you switch. Selected sequences and the current chunk reset.Colors:
Basecolors nucleotides (A green, C blue, G amber, T red) or amino acids by chemistry.Monoshows residues in one color, which makes gaps easy to spot.Diff to firstgrays out residues that match the first sequence, so only the differences stand out.Zoom: use the zoom buttons or slider, or hold
Ctrl(Cmdon macOS) and scroll. When zoomed out, letters are hidden and each site becomes a colored block. SelectLettersto hide or show residue letters.Overview: the strip above the grid shows the whole alignment. The outlined box marks what is on screen. Tap or drag the strip to jump to another part.
Chunks: the alignment is split into chunks of 250 to 2,000 sites (
Chunkin the toolbar). The chunk list on the left shows each chunk's share of gaps and variable sites, so you can find informative or gappy regions fast. Select a chunk, or use the arrows, to move between chunks. Turn onPageto show one chunk at a time.Go to site: enter a site number to jump to it.
Details: hover over or select a cell to see the taxon, site, ungapped position, and residue below the grid.
Name panel: drag the divider between the names and the grid to resize the names. Double-click it to reset the width.
Select sequences: click a name to select its sequence. Hold
Shiftto select a range, orCtrl(Cmdon macOS) to add or remove one. Selected sequences are highlighted in the grid, and the overview dims the rest. Below the grid, chooseCopy as FASTAto copy them,Only selectedto hide the others, orPin to topto move them above the rest. WhenDiff to firstis on, residues are compared with the top sequence, so you can pin a sequence to use it as the reference. SelectClearto deselect all.